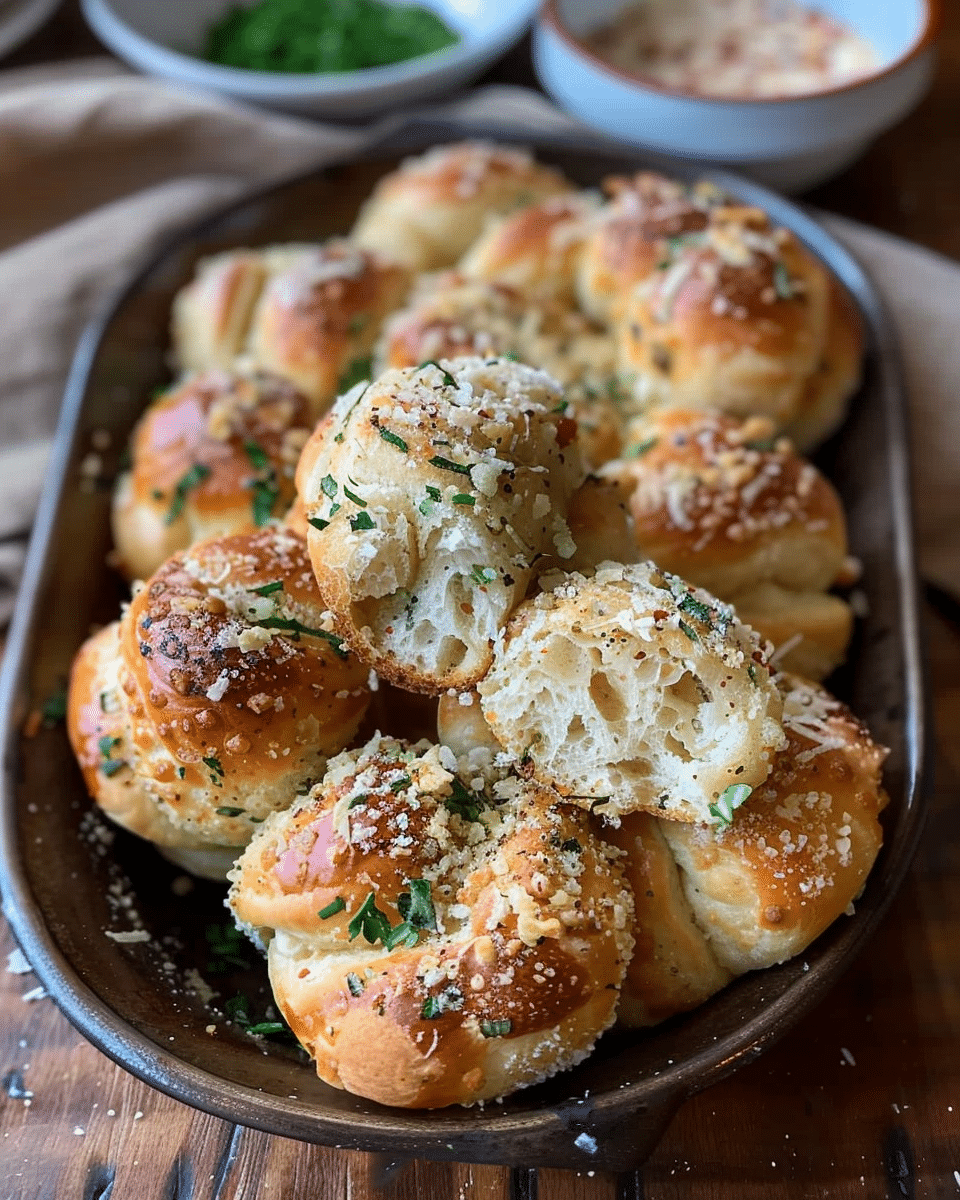
I’m excited to share what I consider the best garlic knots recipe—perfectly soft, chewy, and generously brushed with garlicky, buttery goodness. Whether I make them from scratch or use store-bought dough, these little knots vanish quickly!
Why I’ll Love This Recipe
I love how these garlic knots come out—soft inside with a golden, slightly crisp exterior. The buttery garlic and herb coating seeps into every crevice of the knots, delivering flavor in every bite. Plus, they’re wonderfully versatile: ideal as a side to pasta or pizza, great for dipping into marinara, and even freezer-friendly for later—perfect for busy days.
Ingredients
(Here’s a tip: Check out the full list of ingredients and measurements in the recipe card below.)
I usually use a homemade dough for ultra-soft results, or sometimes I go with a high-quality store-bought dough—it works great too.
Dough (from scratch version)
-
Bread flour
-
Active dry yeast
-
Warm water
-
Granulated sugar
-
Salt
-
Olive oil (or melted butter)
Garlic Butter Coating
-
Unsalted butter, melted
-
Fresh garlic (minced) or garlic powder
-
Herbs (such as parsley, Italian seasoning, or basil)
-
Optional: grated Parmesan cheese for finishing
Directions
-
Make the dough: Combine yeast, warm water, sugar, salt, flour, and olive oil (or butter). Knead until smooth and let rise until doubled in size.
-
Shape into knots: Roll dough into logs, cut into strips, and tie each into a knot.
-
Second rise: Place knots on a baking sheet and let them rest and puff a bit.
-
Preheat oven: Bake at around 400 °F (≈ 200 °C).
-
Brush before baking: Just before baking, brush the knots generously with garlic-herb butter.
-
Bake until golden, about 12–20 minutes depending on oven and knot size.
-
Brush again: After baking, brush with remaining garlic butter and optionally top with Parmesan and herbs.
Servings And Timing
When I follow this recipe, I get about 32 garlic knots with:
-
Prep time: around 40 minutes
-
Rise time: about 3 hours (including two rises)
-
Bake time: 14 minutes
If I make a smaller batch using about 1–2 lb of dough, I typically get 16 knots with a similar timing: dough rise ~60–90 minutes, shape, rest ~30 minutes, bake ~12–15 minutes.
Variations
-
Pull-apart cheesy knots: Toss pre-baked knots in garlic butter with Parmesan and Gruyère, then bake again for a cheesy pull-apart treat.
-
Herb-infused: Add fresh basil or rosemary to the garlic butter for a fragrant twist.
-
Quick dough shortcut: Use flavored garlic & herb pizza dough for a speedy, flavorful base.
Storage/Reheating
When I store leftovers, I keep them in an airtight container at room temperature—they stay fresh for about 3 days. For longer storage, I freeze the knots in a freezer bag for up to 2 months. To reheat, I thaw overnight in the fridge, then warm in the oven at around 350 °F (≈ 175 °C) for about 5 minutes.
FAQs
1. Why does the dough need two rises?
I let it rise twice because the first rise builds volume and flavor, and the second rise after shaping ensures knot structure and fluffiness before baking.
2. Can I use store-bought dough?
Absolutely—I’ve used good-quality pizza dough and the results are still delicious and effortless.
3. Should I brush the knots before or after baking?
I brush them both before and after baking. The pre-bake coat adds flavor and color; the post-bake coat makes them glossy and even more flavorful.
4. Can I freeze garlic knot dough or baked knots?
Yes! I’ve frozen shaped, unbaked knots (flash-freeze then bag); when ready, I thaw, let rise, and bake. They keep well up to 2–3 months.
5. How do I get super soft and chewy knots?
Using bread flour helps. I’ve found it gives the best chew and texture compared to all-purpose flour.
Conclusion
I absolutely love these garlic knots—they’re soft, flavorful, and easy to make. Whether I’m shaping dough from scratch or using a shortcut with store-bought dough, the golden, garlicky results are always crowd-pleasers. I hope you enjoy making (and eating) these as much as I do!
Best Garlic Knots Recipe
5 Stars 4 Stars 3 Stars 2 Stars 1 Star
No reviews
Soft, chewy garlic knots brushed with buttery garlic-herb coating, perfect as a side for pasta, pizza, or dipping into marinara. Can be made from scratch or with store-bought dough.
- Author: Sophia
- Prep Time: 40 minutes
- Cook Time: 14 minutes
- Total Time: 3 hours 54 minutes (including rises)
- Yield: 32 knots (or 16 knots for half batch)
- Category: Bread
- Method: Baking
- Cuisine: Italian-American
- Diet: Vegetarian
Ingredients
Dough (from scratch):
4 cups bread flour
2 1/4 tsp active dry yeast
1 1/4 cups warm water
1 tbsp granulated sugar
1 1/2 tsp salt
2 tbsp olive oil (or melted butter)
Garlic Butter Coating:
1/2 cup unsalted butter, melted
4 cloves garlic, minced (or 1 tsp garlic powder)
2 tbsp fresh parsley, chopped (or 1 tsp Italian seasoning)
Optional: 1/4 cup grated Parmesan cheese
Instructions
- In a mixing bowl, combine yeast, warm water, and sugar. Let sit 5–10 minutes until foamy.
- Add salt, flour, and olive oil. Mix and knead until dough is smooth. Place in greased bowl, cover, and let rise until doubled (1–2 hours).
- Punch down dough and roll into logs. Cut into strips and tie each into a knot.
- Arrange knots on baking sheet, cover, and let rise again until puffy (30–60 minutes).
- Preheat oven to 400°F (200°C). In a small bowl, mix melted butter, garlic, and herbs.
- Brush knots generously with garlic butter before baking.
- Bake 12–15 minutes until golden brown.
- Brush again with remaining garlic butter after baking and sprinkle with Parmesan if desired.
Notes
- For cheesy pull-apart knots, toss baked knots in garlic butter with Parmesan and Gruyère, then bake again.
- Add fresh basil or rosemary to butter for herbal flavor.
- Use store-bought pizza dough for a quick version.
- Freeze baked or shaped unbaked knots for up to 2 months.
Nutrition
- Serving Size: 1 knot
- Calories: 110
- Sugar: 1g
- Sodium: 180mg
- Fat: 4g
- Saturated Fat: 2g
- Unsaturated Fat: 2g
- Trans Fat: 0g
- Carbohydrates: 16g
- Fiber: 1g
- Protein: 3g
- Cholesterol: 8mg
