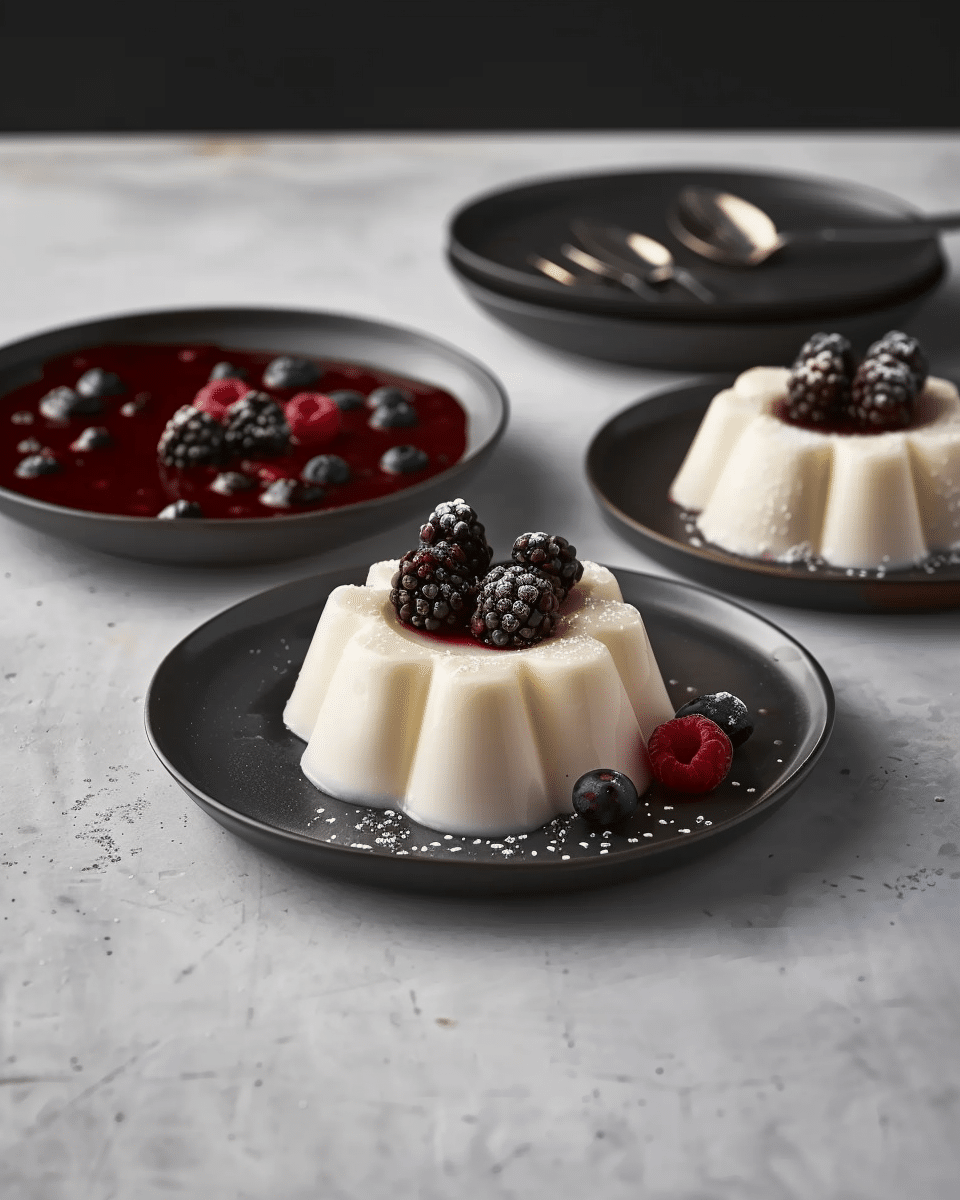
Panna Cotta, meaning “Cooked Cream” in Italian, is a luscious, no-bake dessert that I always reach for when I want something elegant but easy to prepare. Made with cream, sugar, and gelatin, this silky-smooth treat is lightly infused with vanilla and finished with a bright, sweet-tart berry sauce. Whether I serve it in pretty glasses or unmold it like a miniature cake, it never fails to impress—and it’s one of my personal favorites.
Why You’ll Love This Recipe
I love this panna cotta recipe because it’s minimal in effort but maximum in results. The texture turns out perfectly smooth and just firm enough to hold its shape while still being melt-in-the-mouth soft. It’s great for making ahead, which saves me time when entertaining. I also enjoy how customizable it is—once I mastered the base, I started experimenting with different flavors and toppings. But this classic vanilla and berry version always brings me back. It’s refreshing, creamy, and just the right amount of sweet.
Ingredients
(Tip: You’ll find the full list of ingredients and measurements in the recipe card below.)
For The Panna Cotta
100 grams whole milk
500 grams heavy cream
50 grams granulated sugar
50 grams powdered sugar
1 vanilla bean (split and scraped)
4 grams powdered gelatin (or 4 gelatin sheets)
For The Berry Sauce
100 grams mixed berries (fresh or frozen)
25 grams granulated sugar
1 tablespoon lemon juice
Directions
Prepare The Molds I begin by choosing how I want to serve the panna cotta. If I want to unmold it later, I lightly grease each mold with baking spray or melted butter. If I plan to serve it directly in glasses or ramekins, I skip this step.
Hydrate The Gelatin When I use gelatin sheets, I soak them in a bowl of cold water with a few ice cubes for 5 to 10 minutes until soft. If I use powdered gelatin instead, I sprinkle it over 2 tablespoons of warm water and stir until fully dissolved.
Heat The Milk And Dissolve Gelatin In a small saucepan, I bring the milk to a boil, then remove it from the heat. Once the gelatin is hydrated, I squeeze out the excess water (if using sheets) and whisk it into the hot milk until completely dissolved. I set this aside.
Make The Cream Mixture In another pot, I combine the heavy cream, powdered sugar, granulated sugar, and the seeds from the vanilla bean. I whisk everything together and heat over medium heat, stirring constantly, until small bubbles appear around the edges—just before boiling. Then I remove it from the heat.
Combine And Infuse I pour the gelatin-milk mixture into the warm cream and whisk to fully combine. I cover the pot with plastic wrap and let the vanilla infuse the mixture at room temperature for about 30 minutes.
Pour Into Molds And Chill Using a ladle, I fill each prepared mold or glass with the panna cotta mixture. Once they’ve cooled slightly, I cover them with plastic wrap and refrigerate overnight so they can set properly.
Make The Berry Sauce While the panna cotta chills, I prepare the sauce. In a small pot, I combine the berries, sugar, and lemon juice. I bring it to a boil and cook for 2 to 3 minutes, just until the berries break down. I remove the pot from heat, blend the sauce, and strain it through a fine mesh sieve for a smooth texture. I let it cool and then refrigerate it in an airtight container until ready to use.
Serve The Panna Cotta When ready to serve, I either unmold each panna cotta onto a plate and drizzle the berry sauce on top, or I spoon the sauce directly onto the panna cotta in its serving glass. I like to finish with a few fresh berries for color and flavor.
Servings And Timing
Servings: 6
Prep Time: 30 minutes
Chilling Time: 4 hours
Total Time: 4 hours 30 minutes
Calories Per Serving: Approximately 400
Variations
I sometimes swap the vanilla for lavender, coffee, or cardamom to give the panna cotta a different flavor profile.
When berries aren’t in season, I make a mango or passionfruit sauce instead.
For extra indulgence, I’ve layered panna cotta with a thin layer of dark chocolate ganache.
If I want a dairy-free option, I substitute coconut cream and almond milk, though the texture is a little softer.
Storage/Reheating
I store panna cotta in the refrigerator for up to 7 days, making sure it’s covered tightly with plastic wrap or kept in an airtight container. The berry sauce lasts even longer—about 2 weeks refrigerated, and up to 1 month if I freeze it. To thaw the sauce, I just leave it in the fridge overnight. This dessert is served cold, so there’s no reheating necessary.
FAQs
How Can I Tell If The Panna Cotta Is Set?
I gently shake the mold or glass—if the center jiggles slightly but the edges are firm, it’s ready. I always give it a full night to chill for the best results.
Can I Make This Dessert Dairy-Free?
Yes, I’ve made it with coconut cream and almond milk for a dairy-free version. It’s delicious, though a bit softer than the original.
Do I Have To Strain The Berry Sauce?
Not at all. I prefer the sauce smooth, so I strain it, but if I’m in a hurry or want a more rustic finish, I skip that step.
How Can I Easily Unmold The Panna Cotta?
I dip the mold in hot water for a few seconds, then gently run a small knife around the edge and invert it onto a plate. It usually slides right out.
Can I Double The Recipe For A Crowd?
Absolutely. I’ve doubled or even tripled this recipe for dinner parties. I just make sure to use a large enough pot and whisk the gelatin in thoroughly for even setting.
Conclusion
This Vanilla Panna Cotta With Berry Sauce is one of the most reliable and crowd-pleasing desserts I make. It’s rich, creamy, and delightfully light, with the brightness of the berry sauce bringing perfect balance. Whether I’m hosting a fancy dinner or just want a little luxury at the end of the day, this dessert always delivers. Once I made it part of my regular recipe rotation, there was no going back.
Vanilla Panna Cotta With Berry Sauce is a silky, no-bake Italian dessert made with sweetened cream, gelatin, and vanilla. It’s topped with a vibrant berry sauce and is both elegant and easy—perfect for dinner parties or make-ahead treats.
Author:Sophia
Prep Time:30 minutes
Cook Time:0 minutes
Total Time:4 hours 30 minutes
Yield:6 servings
Category:Dessert
Method:Chilling
Cuisine:Italian
Diet:Vegetarian
Ingredients
For the Panna Cotta:
100g whole milk
500g heavy cream
50g granulated sugar
50g powdered sugar
1 vanilla bean (split and scraped)
4g powdered gelatin (or 4 gelatin sheets)
For the Berry Sauce:
100g mixed berries (fresh or frozen)
25g granulated sugar
1 tbsp lemon juice
Instructions
Lightly grease molds if unmolding later. Skip if serving in glasses.
Hydrate gelatin: soak sheets in cold water for 5–10 minutes, or dissolve powdered gelatin in 2 tbsp warm water.
In a saucepan, bring milk to a boil, then remove from heat. Whisk in gelatin until dissolved. Set aside.
In another pot, combine cream, granulated sugar, powdered sugar, and vanilla bean seeds. Heat over medium until small bubbles appear, then remove from heat.
Whisk the gelatin-milk mixture into the warm cream. Cover and let infuse at room temperature for 30 minutes.
Pour into molds or glasses. Once slightly cooled, cover and refrigerate for at least 4 hours or overnight until set.
For the berry sauce, combine berries, sugar, and lemon juice in a small pot. Cook for 2–3 minutes until berries break down. Blend and strain for a smooth sauce. Chill until ready to use.
To serve, unmold panna cotta onto plates or serve in glasses. Spoon berry sauce on top and garnish with fresh berries if desired.
Notes
Refrigerate overnight for best texture and full setting.
To unmold easily, dip mold in hot water for a few seconds.
Use strained berry sauce for a refined finish or leave it rustic for texture.
Double the recipe for entertaining a crowd—just use a larger pot.
Great for make-ahead desserts, stays fresh for up to a week refrigerated.


