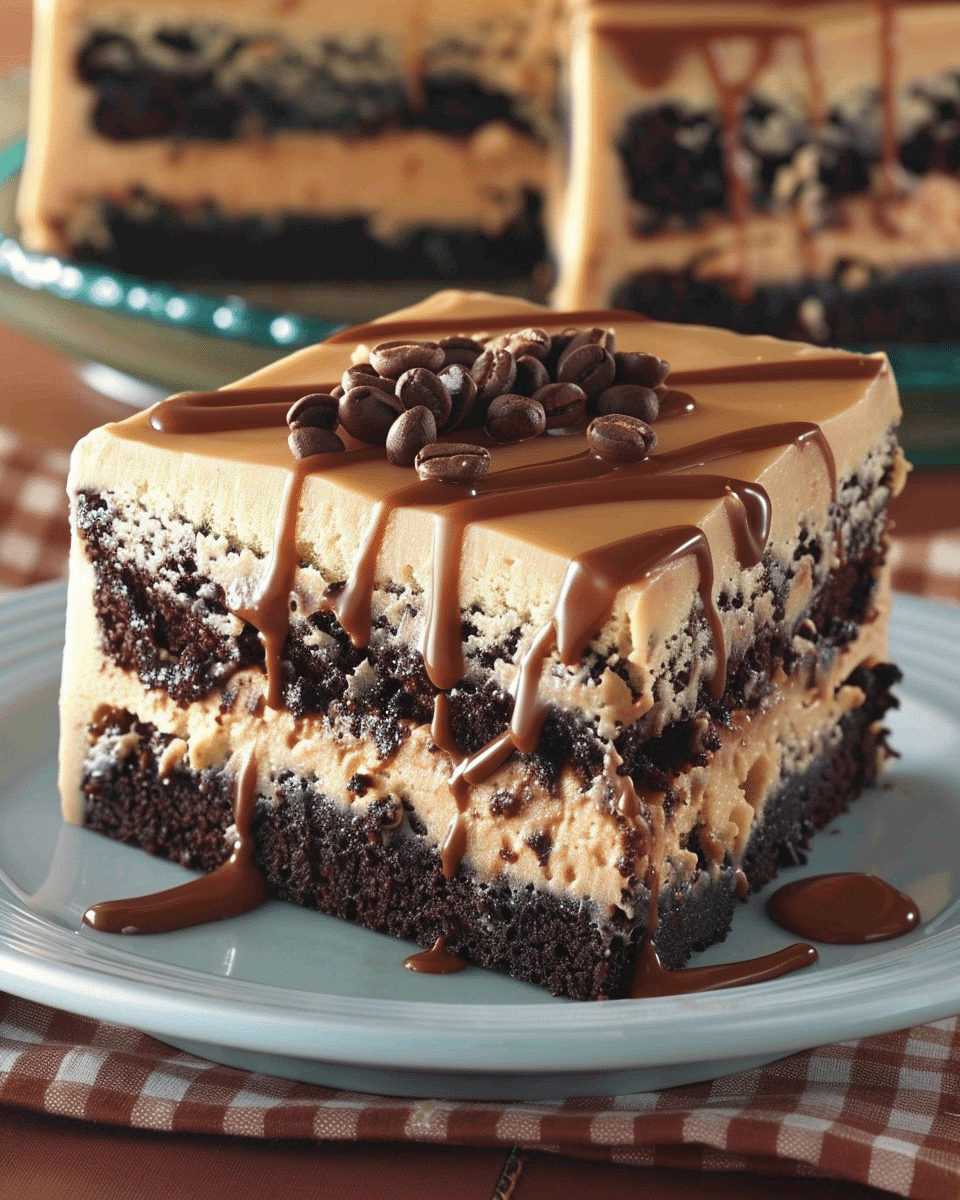
This Mocha Dream Brownie Cake is a rich, layered dessert that blends the deep flavors of chocolate and coffee into one indulgent treat. With fudgy brownie layers, a luscious coffee caramel filling, and a smooth, creamy coffee frosting, this cake is a dream come true for coffee and chocolate lovers alike. I love how the textures come together — chewy, creamy, and perfectly decadent. It’s the kind of dessert I serve when I want to impress without making a traditional cake. Whether it’s for a special occasion or just a personal craving, this dessert never disappoints.
Why You’ll Love This Recipe
I love how this recipe combines rich, dense brownies with smooth coffee buttercream and a gooey coffee filling. The espresso adds a deep, slightly bitter contrast that balances the sweetness perfectly. Each bite is layered with flavor and texture, from the soft brownie base to the creamy frosting on top. I also like how it keeps well in the fridge, and somehow tastes even better the next day. It’s easy to slice, easy to serve, and always gets rave reviews from friends and family.
Ingredients
(Tip: You’ll find the full list of ingredients and measurements in the recipe card below.)
For The Brownie Layers
1 cup (2 sticks) unsalted butter
1 ½ cups granulated sugar
1 cup packed brown sugar
4 large eggs
2 teaspoons vanilla extract
1 cup all-purpose flour
1 cup unsweetened cocoa powder
1 teaspoon instant coffee or espresso powder
½ teaspoon salt
For The Coffee Filling
1 cup granulated sugar
¼ cup water
4 tablespoons unsalted butter
¾ cup heavy cream
1 ½ teaspoons instant coffee or espresso powder
Pinch of salt
For The Coffee Frosting
1 cup unsalted butter, softened
3 ½ cups powdered sugar
3 tablespoons heavy cream or milk
2 teaspoons instant coffee or espresso powder, dissolved in 1 tablespoon hot water
1 teaspoon vanilla extract
For Garnish
½ cup semisweet chocolate chips or melting chocolate
Optional: chocolate-covered espresso beans or cocoa powder for dusting
Directions
Bake The Brownie Layers
I preheat the oven to 350°F (175°C) and line a 9×13-inch baking pan with parchment paper, lightly greasing it.
In a large saucepan, I melt the butter over medium heat. Once melted, I stir in the granulated sugar and brown sugar until smooth and fully dissolved.
I remove the pan from heat, then whisk in the eggs and vanilla extract until the mixture is glossy.
I sift the flour, unsweetened cocoa powder, instant coffee, and salt directly into the pan and stir everything together just until combined.
I pour half of the batter into the prepared pan, smoothing it out into an even layer.
I bake the first layer for 16 to 18 minutes, just until set in the center.
I let it cool slightly, then carefully lift it out using the parchment paper and set it aside.
I pour the remaining batter into the same pan and bake again for 18 to 20 minutes.
Once baked, I let both brownie layers cool completely before moving on to assembly.
Make The Coffee Filling
In a medium saucepan, I combine the granulated sugar and water over medium heat. I let it cook without stirring until it turns a deep amber color.
Once it reaches that color, I immediately remove it from the heat and stir in the butter. It bubbles up quickly, so I stir until the butter melts completely.
I slowly whisk in the heavy cream until smooth, then add the instant coffee and a pinch of salt.
I let the filling cool at room temperature for about 20 to 30 minutes, until it thickens into a spreadable consistency.
Make The Coffee Frosting
In a large mixing bowl, I beat the softened butter until it becomes light and fluffy.
I gradually add the powdered sugar, mixing on low at first and then increasing speed once it’s mostly incorporated.
I add the heavy cream (or milk), the dissolved instant coffee, and the vanilla extract.
I beat the frosting until it’s smooth, creamy, and spreadable.
Assemble The Cake
I place one brownie layer back into the 9×13 pan or onto a serving tray.
I spread the thickened coffee filling evenly over the surface.
I gently place the second brownie layer on top of the filling.
I spread the coffee frosting over the top and edges of the cake.
For a decorative finish, I drizzle melted semisweet chocolate over the frosting in thin, overlapping lines.
I refrigerate the assembled cake for at least 30 minutes to help the filling and frosting set.
Optional Garnish
I sometimes dust the top lightly with cocoa powder or powdered sugar before serving. For an elegant touch, I top each slice with a chocolate-covered espresso bean or a swirl of whipped cream.
Servings And Timing
This recipe yields about 12 to 16 servings, depending on the size of each slice.
Prep Time: 40 minutes
Cook Time: 40 minutes (for both brownie layers)
Cooling and Chilling Time: 30 minutes
Total Time: Approximately 1 hour 50 minutes
Variations
I sometimes add ½ cup of chopped toasted walnuts or pecans to the brownie batter for added crunch.
For a grown-up twist, I stir a tablespoon of coffee liqueur into the filling or frosting.
When I want a more intense coffee flavor, I double the amount of espresso powder in the filling.
For a creamier twist, I’ve used mascarpone instead of the caramel-style filling.
To simplify the recipe, I’ve replaced the coffee frosting with whipped cream and a dusting of cocoa powder for a lighter finish.
Storage/Reheating
I store the cake tightly covered in the refrigerator for up to 5 days. I find it actually tastes better the next day as the coffee flavor continues to develop. Before serving, I let the cake sit at room temperature for 15 to 20 minutes to soften slightly. If I want to reheat a slice, I only warm it for 10 to 15 seconds in the microwave — just enough to slightly melt the frosting without making it runny.
FAQs
How Is This Different From Regular Brownies?
This dessert is layered and frosted like a cake, but with the dense, chewy texture of brownies. It’s richer and more complex than a standard brownie and is meant to be served like a cake.
Can I Use A Boxed Brownie Mix?
Yes, I’ve used boxed mix in a pinch. Just make sure to bake two separate thin layers and continue with the filling and frosting as described.
Can I Make It In Advance?
Definitely. I often make it the day before serving, and the flavors only improve overnight. Just keep it covered in the fridge until ready to slice.
What’s The Best Way To Get Clean Slices?
I use a sharp knife dipped in hot water and wiped clean between each slice. Chilling the cake beforehand also helps create clean, even layers when slicing.
Can I Freeze This Cake?
Yes, I can freeze individual slices by wrapping them in plastic wrap and placing them in an airtight container. They keep well for up to 2 months. I thaw them in the fridge overnight before serving.
Conclusion
This Mocha Dream Brownie Cake has become one of my favorite desserts to make and share. I love how it blends the richness of chocolate with the boldness of coffee in a way that’s balanced, indulgent, and incredibly satisfying. It’s simple enough for casual gatherings but impressive enough for special occasions. Once I tasted that first bite of fudgy brownie and creamy coffee frosting, I knew it would be a repeat recipe in my kitchen.