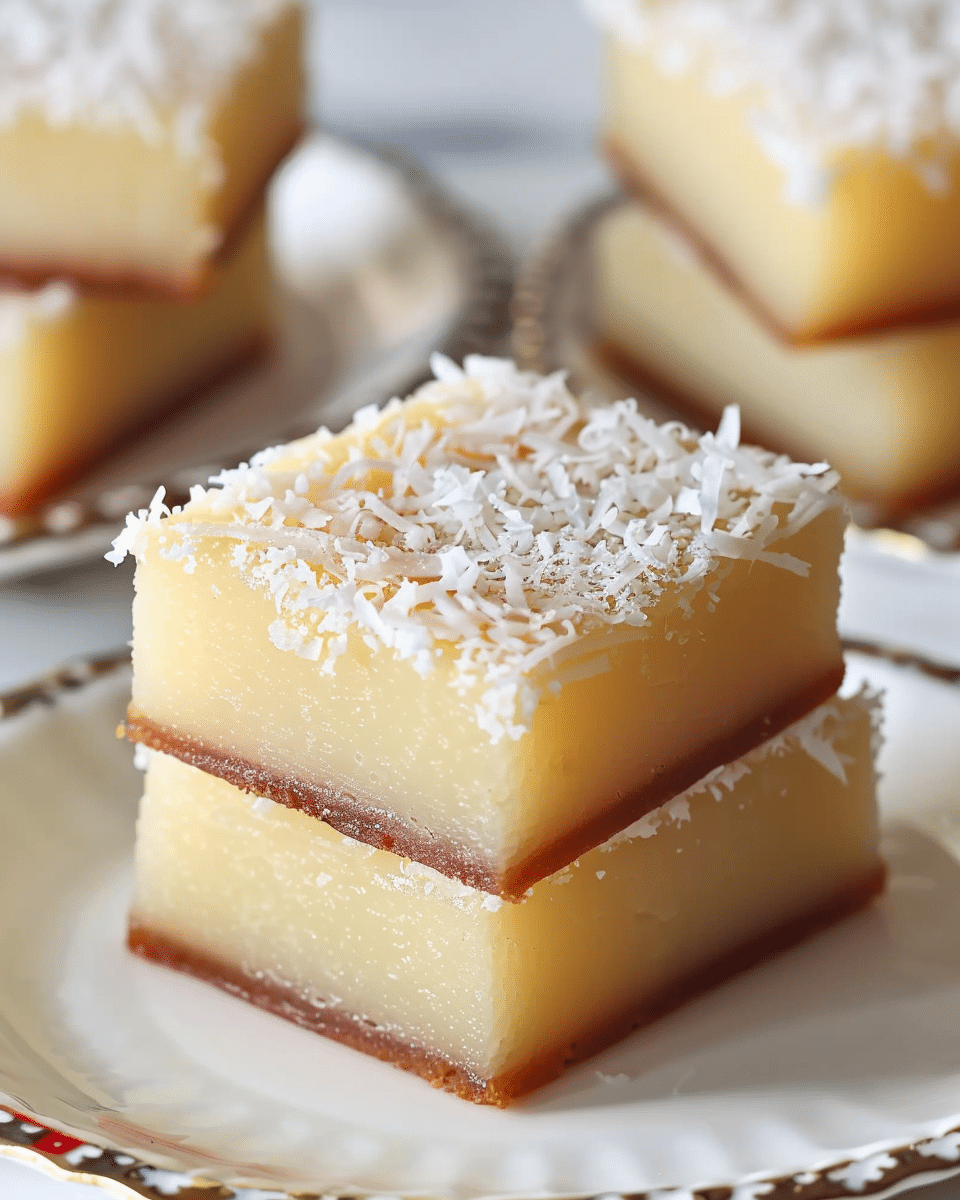
This Hawaiian butter mochi is a rich, coconutty baked treat with a perfectly chewy, custard-like center and a lightly crisp top. Made with glutinous rice flour, coconut milk, and butter, it’s a beloved dessert that feels both comforting and special, perfect for gatherings or quiet moments with tea.
Why You’ll Love This Recipe
This recipe delivers the ideal balance of chewiness and softness that butter mochi is known for. It’s simple to prepare, requires no special equipment, and comes together in one bowl. The flavor deepens as it rests, making it just as delicious the next day. With its naturally gluten-free base and crowd-pleasing texture, it’s a dessert that both kids and adults happily reach for.
Ingredients
(Tip: You’ll find the full list of ingredients and measurements in the recipe card below.)
Unsalted butter or neutral vegetable oil for greasing the pan
1 stick (8 tablespoons) unsalted butter, melted
1 pound glutinous rice flour (sweet rice flour or mochiko)
2 cups granulated sugar
2 teaspoons baking powder
1/2 teaspoon salt
2 cups milk (any fat percentage)
4 large eggs
2 teaspoons vanilla extract
1 can (about 13.5 ounces) unsweetened coconut milk
1/2 cup unsweetened shredded coconut
A few pinches flaky salt (optional)
Directions
Preheat the oven to 350°F and position a rack in the center. Grease a 9×13-inch baking pan with butter or oil.
In a large bowl, whisk together the glutinous rice flour, sugar, baking powder, and salt until evenly combined.
In a separate bowl, whisk the milk, eggs, and vanilla extract until smooth.
Pour the wet mixture into the dry ingredients and stir until fully combined and free of lumps. Add the melted butter and coconut milk, mixing until the batter is smooth and uniform.
Pour the batter into the prepared pan. Gently tap the pan on the counter a few times to release any trapped air bubbles.
Evenly sprinkle the shredded coconut over the top. If using, finish with a light sprinkle of flaky salt.
Bake for 60 to 70 minutes, until the top is golden brown and the center is set.
Remove from the oven and allow the mochi to cool completely in the pan for about 1 hour before slicing into pieces.
Servings and timing
This recipe yields 20 pieces.
Prep time: 20 minutes
Bake time: 60 to 70 minutes
Cooling time: 1 hour
Total time: Approximately 2 hours 30 minutes
Variations
For a richer flavor, replace half of the milk with additional coconut milk.
Add a subtle nutty note by mixing a tablespoon of toasted sesame seeds into the batter.
For a less sweet version, reduce the sugar by 1/4 cup without affecting texture.
You can also omit the shredded coconut topping for a smoother surface if preferred.
Storage/Reheating
Store leftover butter mochi in an airtight container at room temperature for up to 3 days. The texture will become slightly softer over time, which many people enjoy.
To reheat, warm individual pieces briefly in the microwave for about 10 to 15 seconds to restore a freshly baked softness.
FAQs
What makes butter mochi chewy?
The chewiness comes from glutinous rice flour, which creates a stretchy, tender texture unlike regular wheat flour.
Is butter mochi gluten-free?
Yes, when made with pure glutinous rice flour and gluten-free baking powder, butter mochi is naturally gluten-free.
Can I use low-fat milk?
Yes, any fat percentage of milk works well, though higher-fat milk adds a slightly richer flavor.
Why do I need to tap the pan before baking?
Tapping the pan removes air bubbles, helping the mochi bake evenly and form a smooth, uniform crust.
Can I reduce the sugar?
You can reduce the sugar slightly, but lowering it too much may affect both texture and moisture.
How do I know when it’s fully baked?
The top should be golden brown, and the center should feel set when gently pressed.
Can I make this recipe ahead of time?
Yes, butter mochi actually tastes great the next day as the flavors settle and the texture softens.
Why is my mochi too dense?
Overbaking or inaccurate measurements can lead to a firmer, denser texture.
Can I freeze butter mochi?
Freezing is not recommended, as it can negatively affect the chewy texture once thawed.
What’s the best way to cut butter mochi?
Using a plastic knife or lightly greasing a knife helps prevent sticking and gives clean cuts.
Conclusion
Hawaiian butter mochi is a timeless dessert that brings together simple ingredients and comforting textures. With its chewy bite, coconut aroma, and buttery richness, it’s an easy recipe that delivers big rewards. Whether served fresh or enjoyed the next day, it’s a treat that always feels worth making.
A chewy, custard-like Hawaiian treat made with glutinous rice flour, coconut milk, and butter. This simple, one-bowl dessert is naturally gluten-free and perfect for sharing.
Author:Sophia
Prep Time:20 minutes
Cook Time:70 minutes
Total Time:2 hours 30 minutes
Yield:20 pieces
Category:Dessert
Method:Baking
Cuisine:Hawaiian
Diet:Gluten Free
Ingredients
Butter or oil, for greasing the pan
8 tablespoons (1 stick) unsalted butter, melted
1 pound glutinous rice flour (mochiko or sweet rice flour)
2 cups granulated sugar
2 teaspoons baking powder
1/2 teaspoon salt
2 cups milk (any fat percentage)
4 large eggs
2 teaspoons vanilla extract
1 can (13.5 oz) unsweetened coconut milk
1/2 cup unsweetened shredded coconut
Optional: flaky salt for sprinkling
Instructions
Preheat oven to 350°F (175°C). Grease a 9×13-inch baking pan with butter or oil.
In a large bowl, whisk together glutinous rice flour, sugar, baking powder, and salt.
In another bowl, whisk milk, eggs, and vanilla extract until smooth.
Pour the wet mixture into the dry ingredients and stir until well combined.
Add melted butter and coconut milk to the batter. Mix until smooth and uniform.
Pour the batter into the prepared pan and tap gently on the counter to release air bubbles.
Sprinkle shredded coconut evenly on top. Add flaky salt if using.
Bake for 60–70 minutes, until golden brown and the center is set.
Let cool in the pan for 1 hour before slicing into squares.
Notes
For richer flavor, substitute part of the milk with extra coconut milk.
A plastic or greased knife makes cleaner cuts.
Reduce sugar by 1/4 cup for a less sweet version.
Omit shredded coconut topping for a smoother surface.
Flavor deepens and texture softens as it sits overnight.


