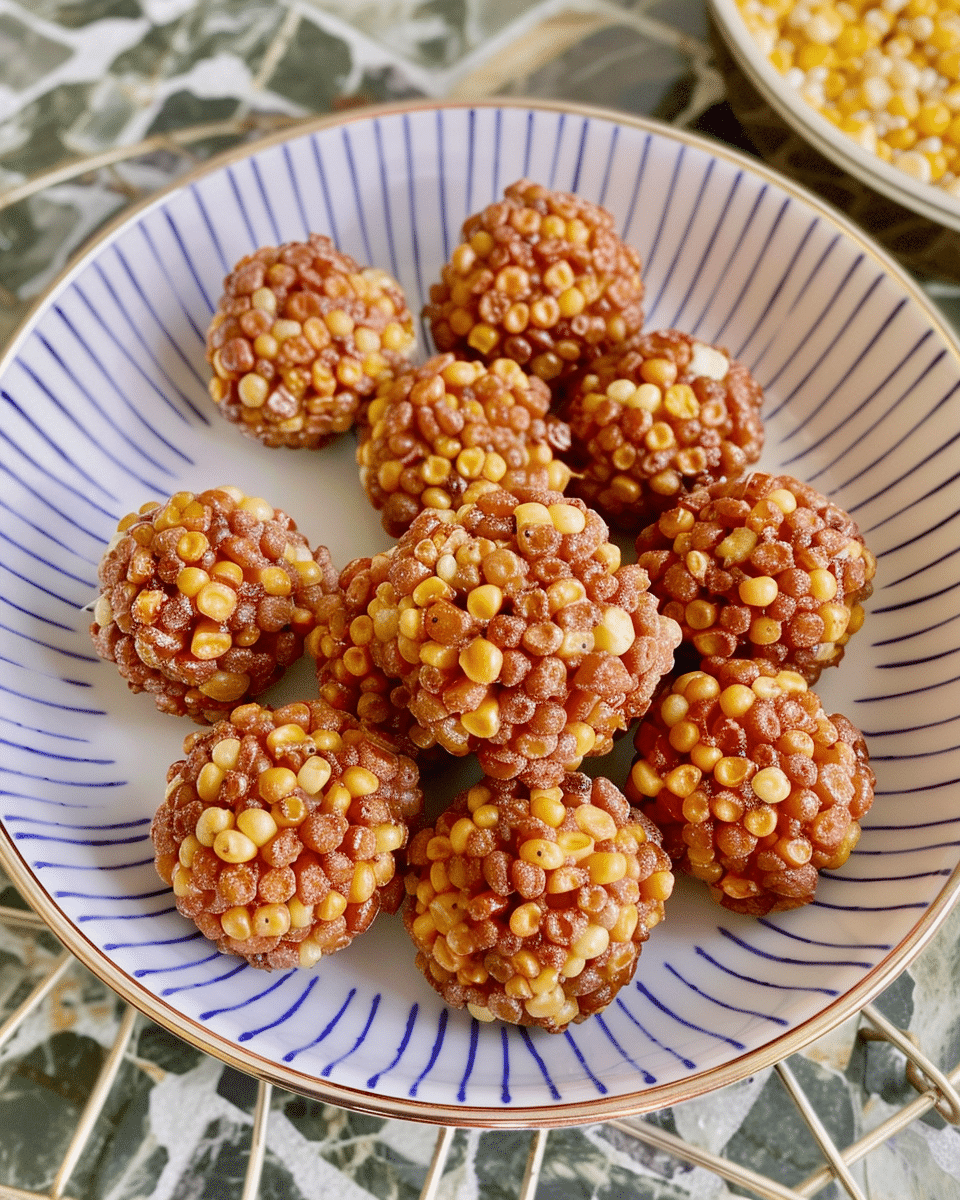
I turned the beloved Korean corn cheese appetizer into a fun finger food. These corn cheese balls are crispy on the outside, creamy and cheesy on the inside, and perfect as a snack or party bite. I love how the sweet kernels of corn pair so nicely with melted cheese — the contrast of flavors is delightful. After deep-frying, the exterior becomes golden and crisp, while inside there’s a gooey cheesy center that oozes when I bite in. I also serve them with a simple mayo and chili powder dip to cut through any heaviness. Best of all, it takes just about 30 minutes from start to finish using everyday pantry ingredients.
Why You’ll Love This Recipe
I like how quick and satisfying this recipe is. It takes less than half an hour, uses only a handful of ingredients, and still manages to deliver rich flavor and great texture. Whether I’m looking for a snack, a party appetizer, or something comforting to eat while watching a movie, these corn cheese balls always hit the spot. The crispy shell with that warm cheesy filling is hard to beat. Plus, I can switch things up with the cheese or spices to suit whatever mood I’m in.
Ingredients
(Tip: You’ll find the full list of ingredients and measurements in the recipe card below.)
-
1 can (14 ounces) of sweet corn, well drained
-
¼ cup all-purpose flour
-
¼ cup cornstarch (or potato starch, if preferred)
-
½ teaspoon salt
-
½ teaspoon granulated sugar
-
1 egg yolk
-
1 tablespoon cold water
-
5 to 6 cubes of mozzarella cheese, each about 1 centimeter in size
-
Neutral oil, for deep frying (such as vegetable, sunflower, or grapeseed oil)
Directions
-
Preheat the oil in a medium-sized pot to 350°F (175°C). I usually use enough oil so the balls can be fully submerged during frying.
-
Drain the sweet corn thoroughly and place the kernels in a large mixing bowl.
-
Add the all-purpose flour, cornstarch, salt, and sugar to the bowl. Toss the corn well so that each kernel gets coated with the dry ingredients.
-
In a small separate bowl, whisk the egg yolk together with the cold water until smooth.
-
Pour the egg mixture into the corn and stir everything until the mixture holds together slightly. It will still be a bit loose, but I gently press it when shaping.
-
Take about 2 tablespoons of the corn mixture and place one cube of mozzarella in the center. Then take another 2 tablespoons of the mixture and place it on top, pressing gently to form a ball and fully enclose the cheese.
-
Carefully lower each formed ball into the hot oil using a slotted spoon or small sieve.
-
Fry each ball for about 4 minutes, or until the outside is golden brown and crispy.
-
Once cooked, remove the balls from the oil and drain on paper towels or a wire rack.
-
Serve immediately while warm. I usually pair them with a simple dip of mayonnaise and a sprinkle of chili powder.
Servings And Timing
-
Servings: Makes 4 to 5 balls
-
Prep Time: 15 minutes
-
Cook Time: 15 minutes
-
Total Time: 30 minutes
Variations
-
I sometimes swap canned corn for fresh or frozen corn, especially when it’s in season. Just make sure to cook and drain it first.
-
To adjust texture, I add a little extra cornstarch if the mixture feels too wet.
-
Different cheeses like cheddar, gouda, or Monterey Jack also work great and offer unique flavor profiles.
-
For a spicy version, I add chopped green chilies or a pinch of red chili flakes to the corn mixture.
-
If I want a slightly healthier version, I bake the balls in a hot oven until golden, although they won’t be quite as crispy as the fried ones.
Storage/Reheating
-
To store: Once cooled, I place the balls in an airtight container and refrigerate for up to 2 days.
-
To reheat: I use an oven preheated to 375°F (190°C) and bake them for about 5 to 7 minutes until hot and crisp again. An air fryer also works very well for this purpose.
-
I don’t recommend microwaving as it can make the outside soggy and the cheese unevenly melted.
FAQs
What Size Of Cheese Cube Should I Use?
I use cubes that are about 1 centimeter on each side. This size melts nicely inside without leaking out and gives the perfect cheesy bite.
Can I Make These Ahead Of Time And Fry Later?
I can shape the balls in advance and keep them refrigerated for a few hours before frying. If I need to store them longer, I prefer freezing them and frying straight from the freezer when ready.
Can I Bake Instead Of Fry?
Yes, I can bake them at 400°F (200°C) for 15 to 18 minutes, turning halfway through. They come out golden but not quite as crunchy as the fried version.
What Oil Is Best For Frying These?
I use a neutral oil with a high smoke point like sunflower, vegetable, or grapeseed oil. These don’t overpower the flavors and handle the high temperature well.
Can I Use Shredded Cheese Instead Of Cubes?
I don’t recommend shredded cheese for this recipe. It’s harder to contain in the center and can melt out during frying. Cheese cubes are easier to work with and stay enclosed.
Conclusion
These corn cheese balls are one of my go-to recipes when I want something crispy, cheesy, and satisfying without spending hours in the kitchen. They’re easy to make, fun to eat, and endlessly customizable. Whether I’m serving them at a party or making a small batch just for myself, they never disappoint.
