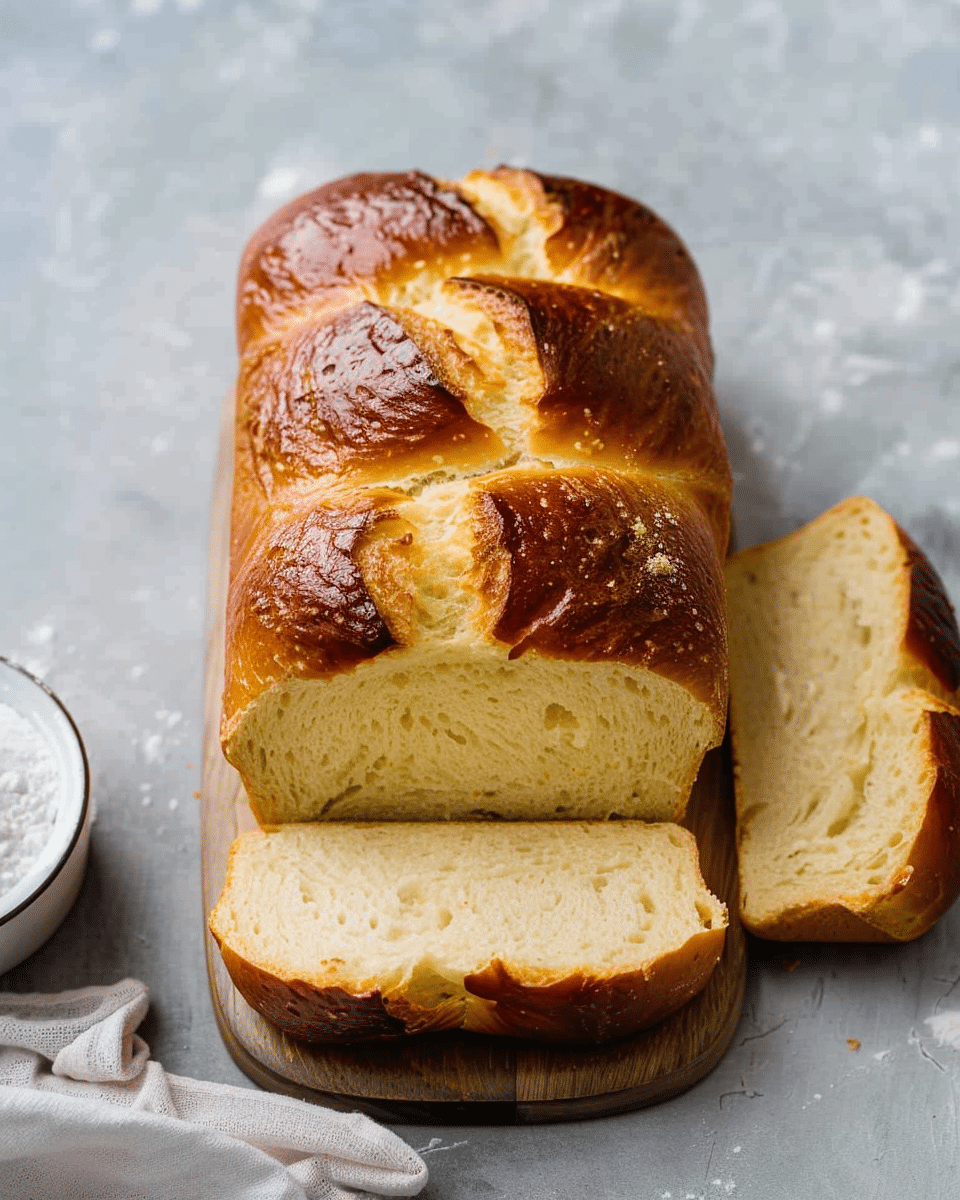
French Brioche Bread is one of the most iconic and deliciously rich breads in the world. Made with butter and eggs, this bread is light, fluffy, and slightly sweet, perfect for any occasion. Whether you’re enjoying it with a spread of jam or turning it into French toast, this French Brioche is sure to impress.

Why You’ll Love This Recipe
There are many reasons to love this French Brioche Bread recipe. It’s incredibly soft, light, and rich in flavor thanks to the generous amount of butter and eggs. The bread has a subtle sweetness that makes it perfect for breakfast, snacking, or even making the best French toast you’ve ever had. The texture is fluffy and airy, and the dough is easy to work with, especially when using a stand mixer. You can also adjust the recipe to suit your dietary needs by swapping in non-dairy options like plant-based butter or milk.
Ingredients
(Tip: You’ll find the full list of ingredients and measurements in the recipe card below.)
-
1 tablespoon fresh yeast (or 2 teaspoons active dry yeast)
-
¼ cup milk (lukewarm, or soy/oat milk for a non-dairy version)
-
2 tablespoons sugar
-
3 eggs
-
2.5 cups all-purpose flour
-
1 teaspoon salt
-
½ cup unsalted butter (chilled, or plant-based butter as a non-dairy alternative)
-
1 egg (for egg wash)
Directions
-
Activate the yeast: In a bowl, combine the yeast, lukewarm milk, and sugar. Let it sit for 5 minutes until the yeast becomes foamy.
-
Mix the dough: Add the eggs to the yeast mixture. Then, in the bowl of a stand mixer, combine the yeast mixture with flour and salt. Mix at low speed for 5 minutes until the dough is sticky.
-
Add butter: Gradually add butter in small pieces, kneading the dough for another 15 minutes on medium speed. The dough will still be sticky but should come off the sides of the bowl easily.
-
First rise: Grease a bowl with oil and place the dough in it. Cover with a damp towel or plastic wrap and let it rise at room temperature for 1 hour.
-
Chill the dough: After the first rise, place the dough in the fridge for 4-16 hours to develop more flavor and fluffiness.
-
Shape the dough: After chilling, turn the dough out onto a lightly floured surface. Divide it into five pieces, shape them into logs, and place them in a greased loaf pan.
-
Second rise: Cover the loaf pan with a damp towel and let the dough rise for another 1.5-2 hours at room temperature.
-
Preheat the oven: Preheat the oven to 395°F (200°C).
-
Bake the brioche: Brush the dough with the beaten egg for a golden top. Bake for 30-35 minutes until the top is golden brown.
-
Cool and slice: Remove the brioche from the oven and let it cool on a wire rack for 15 minutes before removing it from the pan. Allow it to cool completely before slicing.
Servings and Timing
-
Servings: 8 slices
-
Prep Time: 1 hour
-
Cook Time: 30 minutes
-
Dough Rising Time: 7 hours (can be done overnight)
-
Total Time: Approximately 8 hours and 30 minutes
Variations
-
Vegan Brioche: Swap the butter for a plant-based butter and use a non-dairy milk (such as oat or soy) to make this recipe vegan. Unfortunately, the eggs cannot be replaced in this particular recipe.
-
Brioche Buns: Instead of making a loaf, you can shape the dough into smaller buns and bake them for a shorter time. This is perfect for burger buns or sweet treats.
-
Flavored Brioche: Add cinnamon, vanilla extract, or citrus zest to the dough for a unique twist on the classic recipe.
Storage/Reheating
-
Storing: Brioche can be stored at room temperature wrapped in a tea towel or in a plastic bag for up to 3 days.
-
Freezing: To extend its shelf life, freeze the whole loaf or individual slices in ziplock bags for up to 3 months. Defrost in the toaster or oven before serving.
-
Reheating: Brioche is best fresh but can be lightly toasted to refresh its soft, buttery texture.
FAQs
1. Can I use active dry yeast instead of fresh yeast?
Yes, you can use active dry yeast instead of fresh yeast. Just use 2 teaspoons for this recipe.
2. Can I skip the overnight rise in the fridge?
While you can skip the fridge rise, the dough will not be as airy and fluffy. It’s highly recommended for the best results.
3. Can I make this recipe gluten-free?
This recipe is not naturally gluten-free, but you can try substituting the all-purpose flour with a gluten-free flour blend designed for baking.
4. Why is my dough so sticky?
Brioche dough is naturally sticky due to the butter and eggs. Avoid adding too much flour, as it will affect the texture. Use a stand mixer to help with kneading.
5. Can I use a different type of milk?
Yes, you can use plant-based milk such as soy, oat, or almond milk if you prefer a non-dairy option.
6. Can I make this recipe without a stand mixer?
While it’s possible, kneading the dough by hand is very difficult due to its stickiness. A stand mixer is highly recommended for ease and consistency.
7. How can I tell if my brioche is done baking?
The brioche should be golden brown on top and sound hollow when tapped on the bottom. You can also use a kitchen thermometer; it should read about 190°F (88°C) when fully cooked.
8. Can I make this recipe into buns?
Yes, you can shape the dough into individual buns. Just reduce the baking time and remove them when they are golden brown.
9. Can I make this recipe without sugar?
Sugar is essential for feeding the yeast and adding a subtle sweetness to the brioche. Skipping it may affect the bread’s rise and texture.
10. How long does this brioche last?
Fresh brioche is best enjoyed within 3 days at room temperature, but you can freeze it for longer storage.
Conclusion
Making French Brioche Bread at home is a rewarding experience that results in a soft, buttery, and flavorful loaf perfect for all your baking needs. While it takes time, the process is simple and enjoyable, especially with a stand mixer to help with kneading. Whether you enjoy it fresh, toasted with butter, or in a French toast casserole, this homemade brioche bread is sure to impress.
French Brioche Bread
5 Stars 4 Stars 3 Stars 2 Stars 1 Star
No reviews
French Brioche Bread is one of the most iconic and deliciously rich breads in the world. Made with butter and eggs, this bread is light, fluffy, and slightly sweet, perfect for any occasion. Whether you enjoy it with a spread of jam or turn it into French toast, this brioche is sure to impress.
- Author: Sophia
- Prep Time: 1 hour
- Cook Time: 30 minutes
- Total Time: Approximately 8 hours 30 minutes
- Yield: 8 slices
- Category: Bread
- Method: Baking
- Cuisine: French
- Diet: Vegetarian
Ingredients
1 tablespoon fresh yeast (or 2 teaspoons active dry yeast)
¼ cup milk (lukewarm, or soy/oat milk for a non-dairy version)
2 tablespoons sugar
3 eggs
2.5 cups all-purpose flour
1 teaspoon salt
½ cup unsalted butter (chilled, or plant-based butter as a non-dairy alternative)
1 egg (for egg wash)
Instructions
- In a bowl, combine the yeast, lukewarm milk, and sugar. Let it sit for 5 minutes until the yeast becomes foamy.
- Add the eggs to the yeast mixture. Then, in the bowl of a stand mixer, combine the yeast mixture with flour and salt. Mix at low speed for 5 minutes until the dough is sticky.
- Gradually add butter in small pieces, kneading the dough for another 15 minutes on medium speed. The dough will still be sticky but should come off the sides of the bowl easily.
- Grease a bowl with oil and place the dough in it. Cover with a damp towel or plastic wrap and let it rise at room temperature for 1 hour.
- After the first rise, place the dough in the fridge for 4-16 hours to develop more flavor and fluffiness.
- Turn the dough out onto a lightly floured surface. Divide it into five pieces, shape them into logs, and place them in a greased loaf pan.
- Cover the loaf pan with a damp towel and let the dough rise for 1.5-2 hours at room temperature.
- Preheat the oven to 395°F (200°C).
- Brush the dough with the beaten egg for a golden top. Bake for 30-35 minutes until the top is golden brown.
- Remove the brioche from the oven and let it cool on a wire rack for 15 minutes before removing it from the pan. Allow it to cool completely before slicing.
Notes
- For a vegan brioche, swap the butter for plant-based butter and use non-dairy milk.
- For brioche buns, shape the dough into smaller buns and bake them for a shorter time.
- Flavor the dough by adding cinnamon, vanilla extract, or citrus zest for a unique twist.
Nutrition
- Serving Size: 1 slice
- Calories: 210
- Sugar: 4g
- Sodium: 210mg
- Fat: 10g
- Saturated Fat: 6g
- Unsaturated Fat: 4g
- Trans Fat: 0g
- Carbohydrates: 24g
- Fiber: 1g
- Protein: 5g
- Cholesterol: 45mg


