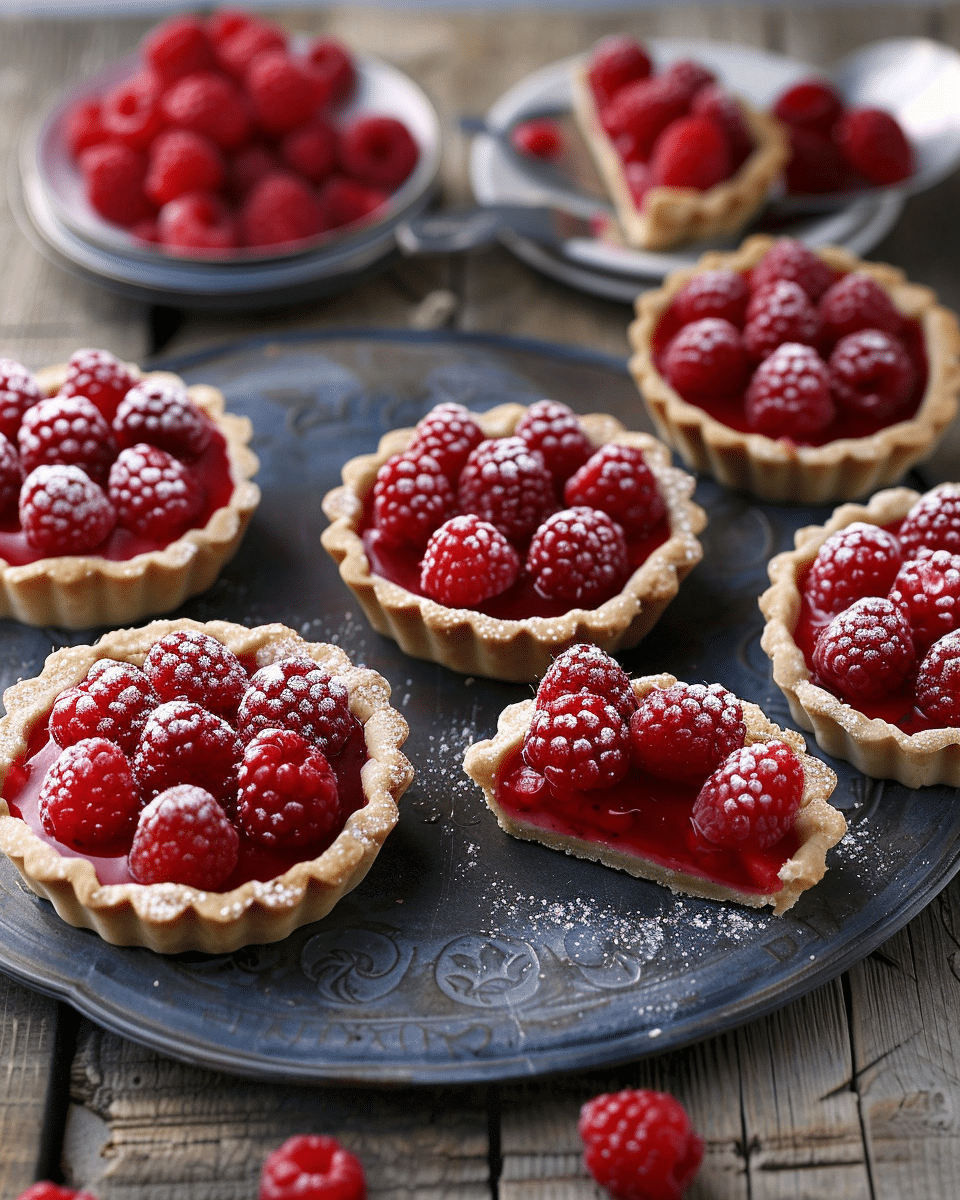
These beautiful tartlets feature a buttery, crisp shortcrust pastry filled with rich vanilla crème pâtissière and topped with vibrant, fresh raspberries. They’re elegant, light, and the perfect finish to a summer meal or afternoon tea spread.
Why You’ll Love This Recipe
Combines textures of crisp pastry, smooth cream, and juicy fruit
Visually stunning, perfect for entertaining
Can be made in parts ahead of time
Versatile: switch up the fruit or flavor the filling differently
A bakery-style dessert you can make at home
Ingredients
(Tip: You’ll find the full list of ingredients and measurements in the recipe card below.)
For the pastry
175g plain flour
75g cold unsalted butter, cut into cubes
25g icing sugar
1 medium egg yolk
1–2 tbsp cold water
For the crème pâtissière (pastry cream)
300ml whole milk
1 tsp vanilla extract or ½ vanilla pod, split and seeds scraped
3 medium egg yolks
60g caster sugar
25g plain flour
10g cornflour
For the topping
200g fresh raspberries
For the glaze (optional)
2 tbsp raspberry jam or redcurrant jelly
1 tsp water
Directions
Make the pastry
In a mixing bowl, rub the flour and cold butter together using your fingertips until the mixture resembles breadcrumbs.
Stir in the icing sugar.
Add the egg yolk and 1 tbsp cold water, mixing gently with a knife until the dough starts to come together. Add more water if needed, a little at a time.
Shape into a disk, wrap in cling film, and chill for 30 minutes.
Roll and bake the tartlets
Preheat the oven to 200°C (180°C fan).
Roll out the chilled pastry on a lightly floured surface to about 3mm thickness.
Cut out rounds and line 6–8 tartlet tins (about 8–10cm in diameter).
Prick the bases with a fork, line with baking parchment, and fill with baking beans.
Bake blind for 10 minutes, then remove beans and parchment and bake for another 5–7 minutes until golden and crisp. Set aside to cool.
Prepare the crème pâtissière
Heat the milk and vanilla in a saucepan until just starting to simmer.
In a separate bowl, whisk the egg yolks with the sugar until pale and thick.
Sift in the flour and cornflour, whisking until smooth.
Gradually pour the hot milk into the egg mixture, whisking constantly to avoid curdling.
Return the mixture to the saucepan and cook over medium heat, stirring continuously, until thickened and smooth.
Pour into a clean bowl, cover the surface directly with cling film, and let it cool completely.
Assemble the tartlets
Spoon or pipe the cooled crème pâtissière into the tartlet shells.
Arrange the raspberries on top, pressing them gently into the cream.
Glaze (optional)
Gently warm the jam or jelly with the water until melted.
Brush lightly over the raspberries to give them a glossy finish.
Chill and serve
Refrigerate the tartlets for at least 1 hour before serving, allowing the flavors to meld and the cream to firm up.
Servings and timing
Makes 6 to 8 tartlets
Preparation time: 40 minutes
Chilling time: 1 hour
Baking time: 15–17 minutes
Total time: About 2 hours including chilling
Variations
Substitute raspberries with sliced strawberries, blueberries, or a mix of seasonal fruits.
Add a hint of lemon zest to the pastry cream for a citrus note.
Infuse the milk with a cinnamon stick or orange peel for a spiced version.
Use a chocolate shortcrust base for a twist on the classic.
Add a layer of raspberry jam under the cream for extra berry flavor.
Storage/Reheating
Storage: Store in the refrigerator, covered, for up to 2 days. Best eaten fresh.
Freezing: The tartlet shells (unfilled) can be frozen for up to 1 month. Do not freeze with the cream and raspberries.
Reheating: Not necessary. Serve chilled. If shells are frozen, thaw and refresh in the oven for 5 minutes at 180°C before filling.
FAQs
Can I make the pastry in advance?
Yes, you can make and chill the pastry dough up to 2 days ahead or freeze it for longer storage. You can also bake the shells a day in advance.
What if I don’t have tartlet tins?
You can use a muffin tin lined with strips of parchment to help lift them out, or make one large tart using a standard 23cm tart tin.
Can I use store-bought pastry?
Yes, ready-made shortcrust pastry can be used to save time. It won’t be quite as buttery, but still works well.
Can I use custard powder instead of making crème pâtissière?
You can substitute it, though the flavor and texture won’t be as rich. Use thick-set custard to hold the raspberries in place.
How do I stop the pastry from getting soggy?
Blind-baking the tartlet shells is key. For extra protection, you can brush a thin layer of melted white chocolate on the inside once cooled before adding the filling.
Can I use frozen raspberries?
Frozen raspberries tend to be softer and more watery once thawed, so they are not ideal for topping. If you use them, drain and dry well before placing.
What can I do if my crème pâtissière is lumpy?
Strain the finished custard through a sieve while it’s still hot to remove any lumps and ensure a silky texture.
How can I make these gluten-free?
Use a gluten-free flour blend for the pastry and ensure the flours used in the filling (like cornflour) are also gluten-free.
Can I make this dairy-free?
Yes, substitute the milk with almond or oat milk and use dairy-free butter and cream alternatives. Be aware the texture may differ slightly.
How do I get the raspberries to sit neatly on top?
Arrange them from the outside in, upright, starting with the edge and working toward the center. Choose berries of similar size for a uniform look.
Conclusion
Fresh raspberry tartlets are a classic dessert that balances delicate textures and rich flavors with bright, fruity freshness. Whether you’re impressing guests or treating yourself, this recipe delivers beauty and taste in every bite. Best of all, you can prepare components in advance for a stress-free, show-stopping finish.
Fresh Raspberry Tartlets feature crisp, buttery shortcrust pastry filled with silky vanilla crème pâtissière and topped with juicy raspberries. Light, elegant, and perfect for entertaining, these tartlets are a show-stopping treat made entirely from scratch.
Author:Sophia
Prep Time:40 minutes
Cook Time:15–17 minutes
Total Time:2 hours
Yield:6–8 tartlets
Category:Dessert
Method:Baking
Cuisine:French
Diet:Vegetarian
Ingredients
For the pastry:
175g plain flour
75g unsalted butter (cold, cubed)
25g icing sugar
1 medium egg yolk
1–2 tbsp cold water
For the crème pâtissière:
300ml whole milk
1 tsp vanilla extract (or ½ vanilla pod, seeds scraped)
3 medium egg yolks
60g caster sugar
25g plain flour
10g cornflour
For the topping:
200g fresh raspberries
Optional glaze:
2 tbsp raspberry jam or redcurrant jelly
1 tsp water
Instructions
Make the pastry: In a bowl, rub flour and butter together until crumbly. Stir in icing sugar. Add egg yolk and 1 tbsp cold water; mix gently until dough forms. Add more water if needed. Shape into a disk, wrap in cling film, and chill for 30 minutes.
Roll & bake the shells: Preheat oven to 200°C (180°C fan). Roll pastry to 3mm thickness, cut into rounds, and line 6–8 tartlet tins (8–10cm). Prick bases, line with parchment, and fill with baking beans. Bake for 10 mins. Remove beans and bake 5–7 mins more until golden. Cool completely.
Make crème pâtissière: Heat milk and vanilla in a saucepan to a simmer. In a bowl, whisk egg yolks and sugar until pale. Add flour and cornflour; whisk smooth. Gradually whisk in hot milk. Return to pan and cook over medium heat, stirring, until thickened. Pour into a bowl, cover surface with cling film, and cool completely.
Assemble: Spoon or pipe cooled pastry cream into tart shells. Top with raspberries.
Optional glaze: Warm jam and water until melted. Brush over raspberries for shine.
Chill: Refrigerate for at least 1 hour before serving.
Notes
Chill pastry well before rolling for easy handling.
Strain pastry cream while warm if lumpy.
For extra berry flavor, add a thin jam layer under the cream.


