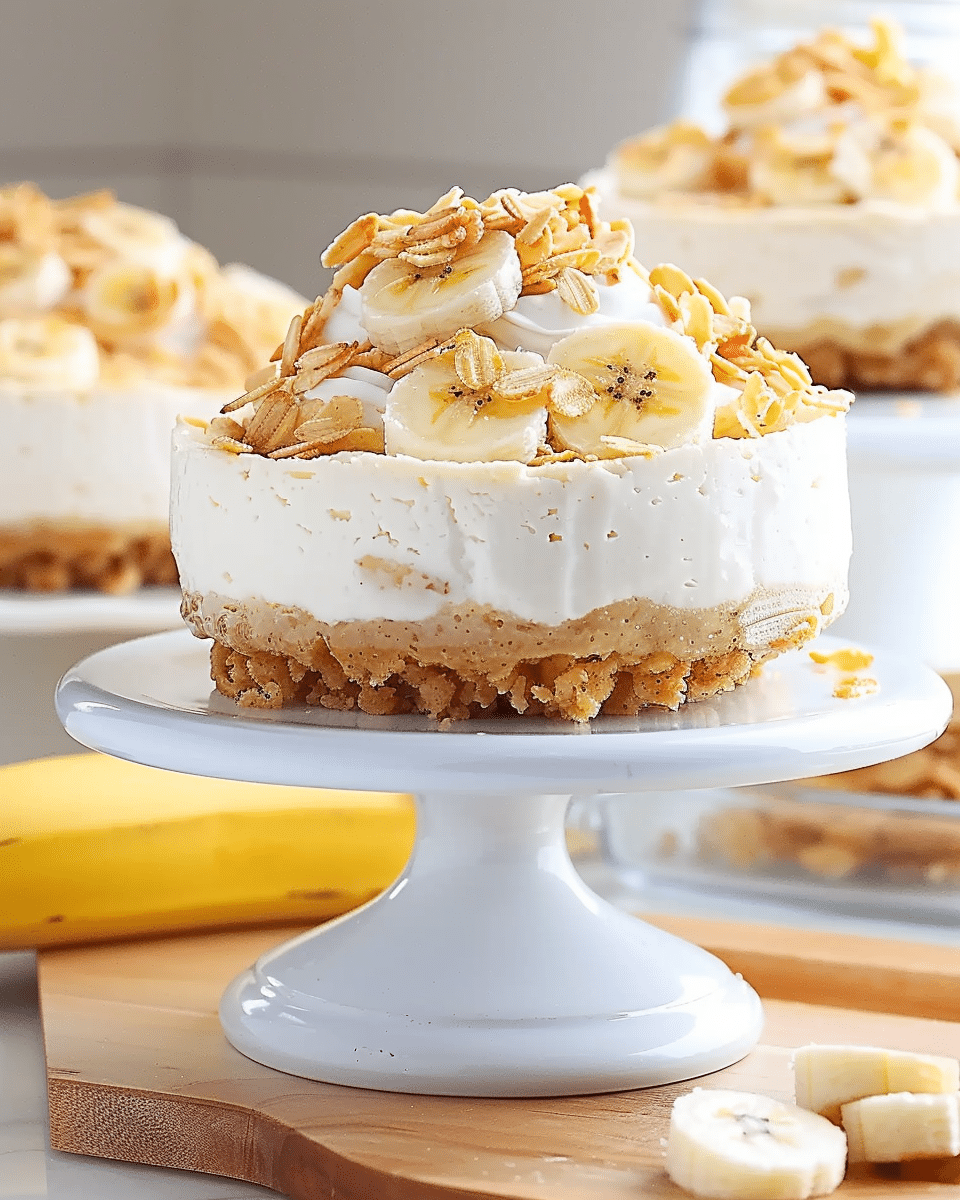
These Mini Banana Pudding Cheesecakes are the perfect blend of creamy cheesecake and nostalgic banana pudding, all wrapped into bite-sized portions that are easy to make and even easier to devour. I love making these for parties, special dinners, or even as a fun weeknight dessert. They’re simple, elegant, and a guaranteed crowd-pleaser. With layers of vanilla wafer crust, silky banana cheesecake, and a dreamy banana pudding topping, every bite is a little piece of heaven.
Why You’ll Love This Recipe
I enjoy this recipe for so many reasons:
It’s a no-bake dessert (aside from an optional quick crust bake), which means less time in the kitchen and no heating up the house.
Each cheesecake is individually portioned, so I don’t need to worry about slicing or serving.
I can easily make them ahead of time, which is perfect for planning events or prepping the night before.
The flavor combination of banana and cream cheese is just the right balance of sweet and tangy.
I love how versatile they are—I can change the toppings or filling variations depending on what I have on hand.
Ingredients
(Tip: You’ll find the full list of ingredients and measurements in the recipe card below.)
For The Crust: 1 cup crushed vanilla wafers 2 tablespoons melted butter
For The Cheesecake Filling: 8 ounces cream cheese, softened 1/2 cup powdered sugar 1 teaspoon vanilla extract 1 cup heavy cream, chilled
For The Banana Pudding Layer: 1 cup instant banana pudding mix 2 cups cold milk
For Topping: 2 ripe bananas, sliced Whipped cream for garnish
Directions
Prepare The Crust I start by combining the crushed vanilla wafers and melted butter in a bowl. I mix until the texture resembles wet sand. Then, I divide the mixture evenly between 12 lined muffin cups, pressing it down firmly into each base. For extra structure, I sometimes bake the crusts at 350°F (175°C) for 8 minutes, but chilling them in the fridge for 10–15 minutes also works well.
Make The Cheesecake Filling I beat the softened cream cheese in a large bowl until smooth. Once it’s creamy, I add the powdered sugar and vanilla extract and mix until well combined. In a separate bowl, I whip the cold heavy cream until stiff peaks form. Then, I gently fold the whipped cream into the cream cheese mixture, being careful not to deflate the airiness.
Prepare The Banana Pudding Layer In another bowl, I whisk together the instant banana pudding mix and cold milk for about 2 minutes, until it thickens to a smooth consistency. I let it sit for a couple of minutes to fully set before layering.
Assemble The Cheesecakes I spoon the cheesecake filling over the chilled crusts, filling each cup about two-thirds full. Then, I top each one with a layer of the banana pudding. I gently spread the pudding to cover the top evenly, smoothing it with the back of a spoon or spatula.
Chill And Set I refrigerate the mini cheesecakes for at least 4 hours, but I often let them sit overnight to make sure they’re fully set and the flavors have blended beautifully.
Garnish And Serve Just before serving, I add a dollop of whipped cream and a banana slice to each mini cheesecake. Sometimes, I sprinkle extra crushed wafers on top for a little crunch and texture.
Servings And Timing
Yield: 12 mini cheesecakes
Preparation Time: 30 minutes
Chilling Time: 4 hours
Total Time: 4 hours 30 minutes
These are ideal for serving at parties, as a weekend treat, or as a simple, no-fuss dessert.
Variations
Chocolate Banana Cheesecakes: I like adding melted chocolate to the cheesecake mixture or using chocolate cookie crumbs for the crust when I want a richer dessert.
Peanut Butter Banana: Swirling a spoonful of peanut butter into the cheesecake filling adds a nutty contrast that pairs perfectly with the banana.
Coconut Banana: I sometimes mix shredded toasted coconut into the crust or sprinkle it on top for a tropical vibe.
Caramel Banana: A drizzle of caramel sauce over the finished cheesecakes makes them extra decadent.
Berry Banana: For a fruity twist, I top each cheesecake with a fresh raspberry or strawberry slice before serving.
Storage/Reheating
Refrigeration: I store the mini cheesecakes in an airtight container in the fridge for up to 5 days. They’re at their best during the first 2–3 days.
Freezing: I freeze the cheesecakes without the banana topping or whipped cream. Once frozen solid, I transfer them to a freezer-safe container and keep them for up to 1 month. I let them thaw in the refrigerator overnight before garnishing.
Serving Tip: I always add the banana slices and whipped cream just before serving to keep everything fresh and visually appealing.
FAQs
How Do I Keep The Banana Slices From Browning?
To keep the bananas looking fresh, I slice them just before serving and sometimes brush them with a little lemon juice to slow down browning.
Can I Make These Mini Cheesecakes Ahead Of Time?
Yes, I usually make them a day in advance. They hold up well in the refrigerator overnight and actually taste even better after sitting.
Can I Use Homemade Banana Pudding?
Absolutely. I sometimes make a stovetop banana pudding from scratch for a richer flavor, but the instant version works great when I’m short on time.
Do I Need To Use Cupcake Liners?
I highly recommend it. Liners make removing the mini cheesecakes from the tin so much easier, and they help with presentation too.
Can I Make These Without A Mixer?
Yes, I’ve made them using just a whisk and some elbow grease. The filling might be slightly less airy, but they still turn out creamy and delicious.
Conclusion
Mini Banana Pudding Cheesecakes are one of my favorite desserts to make because they’re simple, satisfying, and always a hit with guests. I love how the flavors come together—sweet banana, creamy cheesecake, and that classic vanilla wafer crunch. Whether I’m serving them at a party, gifting them to a friend, or enjoying one as a sweet reward after dinner, they never disappoint. If you haven’t tried these yet, now’s the perfect time to add them to your dessert rotation.
Mini Banana Pudding Cheesecakes are a delightful blend of creamy cheesecake and classic banana pudding in perfectly portioned cups. With a buttery vanilla wafer crust, smooth banana-infused cheesecake, and a luscious banana pudding topping, these no-bake treats are simple, elegant, and irresistibly delicious. Ideal for parties, gatherings, or an easy make-ahead dessert.
In a bowl, combine crushed vanilla wafers and melted butter until the texture resembles wet sand.
Divide the crust mixture evenly among 12 lined muffin cups, pressing firmly into each base. Bake at 350°F (175°C) for 8 minutes or chill in the fridge for 10–15 minutes to set.
In a large bowl, beat softened cream cheese until smooth. Add powdered sugar and vanilla extract, mixing until well combined.
In a separate bowl, whip the heavy cream until stiff peaks form. Gently fold the whipped cream into the cream cheese mixture to create a light, creamy filling.
In another bowl, whisk together banana pudding mix and cold milk for about 2 minutes until thickened. Let it set for a few minutes.
Spoon the cheesecake filling over the prepared crusts, filling each about two-thirds full. Top with a layer of banana pudding, spreading evenly.
Refrigerate for at least 4 hours, or overnight, until firm and set.
Before serving, top each cheesecake with a dollop of whipped cream, a banana slice, and crushed vanilla wafers if desired.
Notes
Use cupcake liners for easy removal and clean presentation.
For extra flavor, drizzle caramel or chocolate sauce on top.
Keep banana slices fresh by brushing them with a little lemon juice before serving.
Cheesecakes can be made a day in advance and taste even better after chilling overnight.
Freeze without toppings for up to 1 month and thaw before serving.


