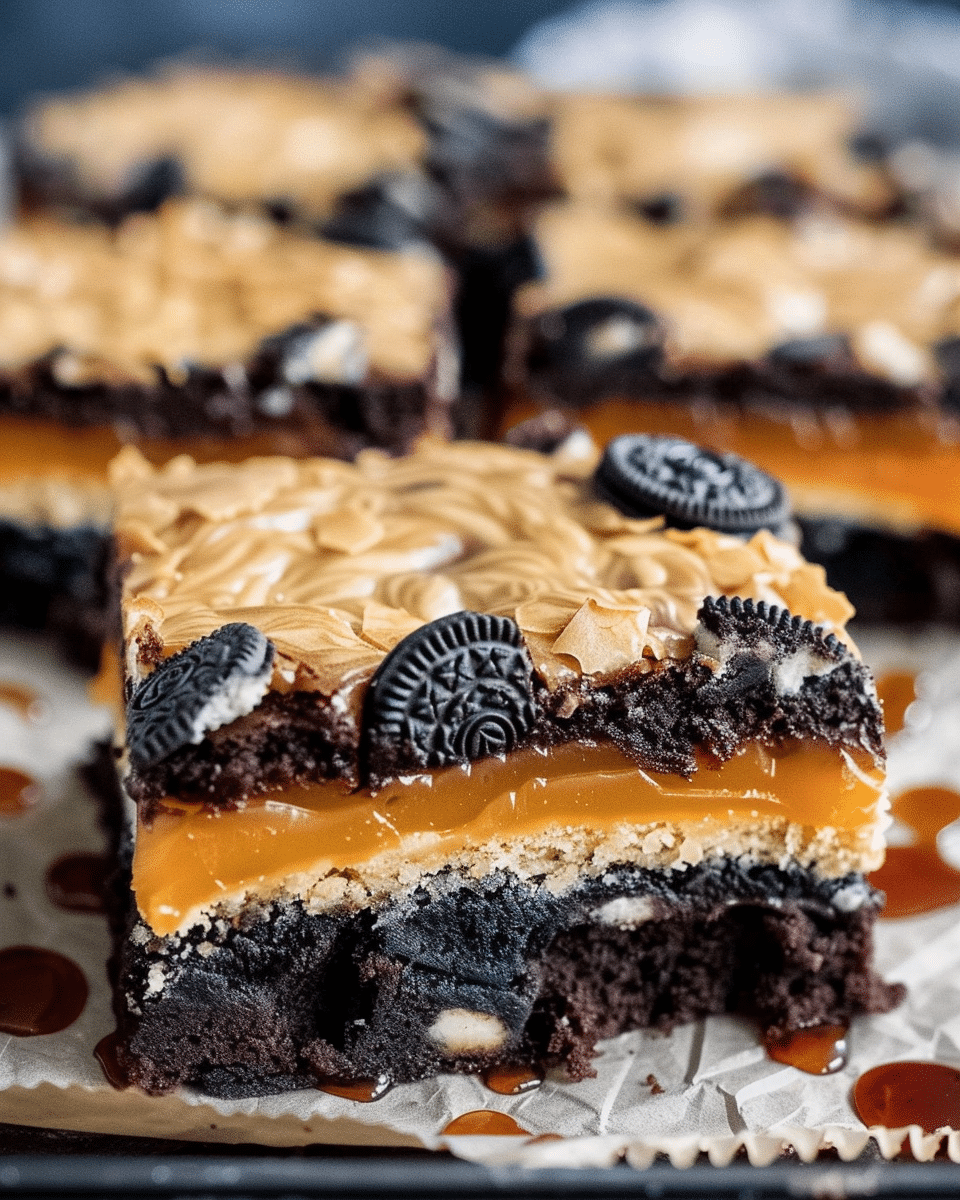
These brownies are rich, fudgy, and festive — a fun combination of deep chocolate, creamy layers, and crunchy Oreo bits that make them perfect for Halloween gatherings.
Why You’ll Love This Recipe
I love how the layers bring contrast: a dense, chewy brownie base; a cream‑cheese–style middle or frosting layer; and crunchy Oreo texture throughout. I also enjoy decorating them for Halloween — adding candy eyes, orange drizzle, or spooky touches makes them festive and fun to serve.
Ingredients
(Tip: You’ll find the full list of ingredients and measurements in the recipe card below.)
For the Brownie Batter
1 cup (227 g) unsalted butter, melted
2 tablespoons vegetable oil
1¼ cups granulated sugar
½ cup packed light brown sugar
4 large eggs, room temperature
2 teaspoons vanilla extract
½ teaspoon salt
1 cup (125 g) all‑purpose flour
1 cup (100 g) cocoa powder
1 cup (170 g) semisweet chocolate chips
For The Oreo Layer & Topping
20 Oreo cookies (or Halloween‑themed Oreos, if available)
Crushed Oreo pieces (reserved from some of the cookies)
For The Frosting / Creamy Layer
½ cup (113 g) butter, melted
2 cups (240 g) powdered sugar
1 teaspoon vanilla extract
2 to 3 tablespoons milk (adjust for consistency)
Optional: food coloring (orange, green)
Optional: additional crushed Oreos for topping
Optional: candy pumpkins or candy eyes for decoration
Directions
Preheat the oven to 350 °F (175 °C). Grease a 9×9 (or 8×12) baking pan and line it with parchment paper, leaving some overhang for easier removal.
In a large bowl, whisk together melted butter, vegetable oil, granulated sugar, and brown sugar until smooth and combined.
Add eggs one at a time, whisking well after each addition, then stir in vanilla extract.
Sift in flour, cocoa powder, and salt. Use a rubber spatula to gently fold until just combined (don’t overmix).
Fold in chocolate chips.
Pour about half of the brownie batter into the prepared pan and spread evenly.
Place Oreo cookies in a single layer over the batter (they can be whole or slightly broken).
Pour the remaining brownie batter carefully over the Oreo layer, attempting to cover most of the cookies.
Bake for 25 to 30 minutes, or until the center no longer jiggles and a toothpick inserted into the brownie portion comes out with a few moist crumbs. Do not overbake (for fudgy texture).
While the brownies bake or cool, prepare the frosting/cream layer: whisk melted butter, powdered sugar, and vanilla until smooth. Add milk a tablespoon at a time until you reach a spreadable consistency. If desired, divide a small portion and tint with food coloring.
Once brownies are completely cooled, spread the frosting evenly over the top.
Sprinkle crushed Oreo pieces on top. Add candy pumpkins or candy eyes for decoration, if using.
Use the parchment overhang to lift the brownie slab out of the pan. Slice into bars or squares.
Servings And Timing
Servings: about 16 to 24 bars, depending on how large you cut them
Prep Time: 15 minutes
Bake Time: 25–30 minutes
Cooling Time: about 1 hour
Total Time: ~1 hour 45 minutes
Variations
Add a swirl of salted caramel sauce into the frosting layer before it sets.
Fold chopped nuts (walnuts, pecans) into the brownie batter for extra crunch.
Use colored candy melts (orange, black) to drizzle on top for seasonal flair.
Swap in gluten‑free flour for all‑purpose to make them gluten‑free.
Use mint or seasonal flavored Oreos for a twist in taste.
Storage/Reheating
Storage: Keep the brownies in an airtight container at room temperature for up to 3 days.
Refrigeration: Store in the fridge up to 5 days (they’ll become denser).
Freezing: Wrap tightly (foil + plastic wrap) and freeze up to 2 months. Thaw overnight in the fridge before serving.
Reheating: Warm an individual bar in the microwave for about 10–15 seconds, or place in a low oven (around 150 °C) for a few minutes to soften.
FAQs
How do I keep the brownies fudgy instead of cakey?
I stop baking as soon as the center is set but still slightly moist. Overbaking makes them drier. Also, don’t overmix the batter — fold gently once dry ingredients are added.
Can I use a boxed brownie mix instead of making batter from scratch?
Yes, I sometimes use a boxed mix (following its instructions) and layer whole Oreos or broken Oreos in between the batter and pour more batter on top. It’s a quicker shortcut.
Will the Oreo cookies soak too much and get soggy?
If you don’t overbake and they’re sandwiched between batter layers, they stay pleasantly soft with a little bite. Be sure the top frosting is added after cooling so cookies don’t dissolve.
Can I make this a day ahead?
Yes, I often make it the day before. Just cover and refrigerate. Before serving, bring to room temperature or warm slightly for best texture.
What’s the best way to cut clean bars?
I chill the entire slab first, then run a sharp knife under hot water and dry it before cutting. Wiping the blade between cuts helps maintain clean edges.
Conclusion
I adore this layered Oreo Halloween brownie recipe because it balances fudgy chocolate, creamy frosting, and crunchy cookies, all with a festive flair. It’s a guaranteed hit for Halloween parties or cozy dessert nights. If you like, I can format it into a recipe card for you or help adjust measurements for a different pan size.
These Oreo Layered Halloween Brownies are rich, fudgy, and perfectly festive with layers of chocolate brownie, creamy frosting, and crunchy Oreos. Topped with candy decorations, they’re ideal for Halloween parties or spooky gatherings.
Author:Sophia
Prep Time:15 minutes
Cook Time:30 minutes
Total Time:1 hour 45 minutes
Yield:16–24 bars
Category:Dessert
Method:Baked
Cuisine:American
Diet:Vegetarian
Ingredients
1 cup (227 g) unsalted butter, melted
2 tablespoons vegetable oil
1¼ cups granulated sugar
½ cup packed light brown sugar
4 large eggs, room temperature
2 teaspoons vanilla extract
½ teaspoon salt
1 cup (125 g) all-purpose flour
1 cup (100 g) cocoa powder
1 cup (170 g) semisweet chocolate chips
20 Oreo cookies (or Halloween-themed Oreos)
Crushed Oreo pieces (reserved from some of the cookies)
½ cup (113 g) butter, melted
2 cups (240 g) powdered sugar
1 teaspoon vanilla extract
2 to 3 tablespoons milk (adjust for consistency)
Optional: food coloring (orange, green)
Optional: additional crushed Oreos for topping
Optional: candy pumpkins or candy eyes for decoration
Instructions
Preheat oven to 350°F (175°C). Grease and line a 9×9-inch or 8×12-inch baking pan with parchment paper, leaving an overhang for easy removal.
In a large bowl, whisk together melted butter, vegetable oil, granulated sugar, and brown sugar until smooth.
Add eggs one at a time, whisking after each addition. Stir in vanilla extract.
Sift in flour, cocoa powder, and salt. Gently fold until just combined, then fold in chocolate chips.
Spread half of the brownie batter into the prepared pan.
Arrange Oreo cookies in a single layer over the batter.
Pour the remaining brownie batter over the Oreos and smooth the top.
Bake for 25–30 minutes, until the center is set but slightly fudgy. Cool completely in the pan.
Meanwhile, make the frosting: whisk melted butter, powdered sugar, and vanilla until smooth. Add milk gradually until spreadable. Add food coloring if desired.
Spread frosting evenly over cooled brownies. Top with crushed Oreos and candy decorations.
Use the parchment overhang to lift brownies from the pan. Slice into bars or squares to serve.
Notes
Do not overmix the batter to maintain fudgy texture.
For cleaner cuts, chill the brownies before slicing.
Swap regular Oreos for seasonal flavors for variety.
Use colored candy melts or sprinkles for extra Halloween flair.
Store in an airtight container at room temperature for 3 days or in the fridge for up to 5 days.
Freeze up to 2 months; thaw in the fridge overnight before serving.


